Waved Sphinx

August 24, 2026

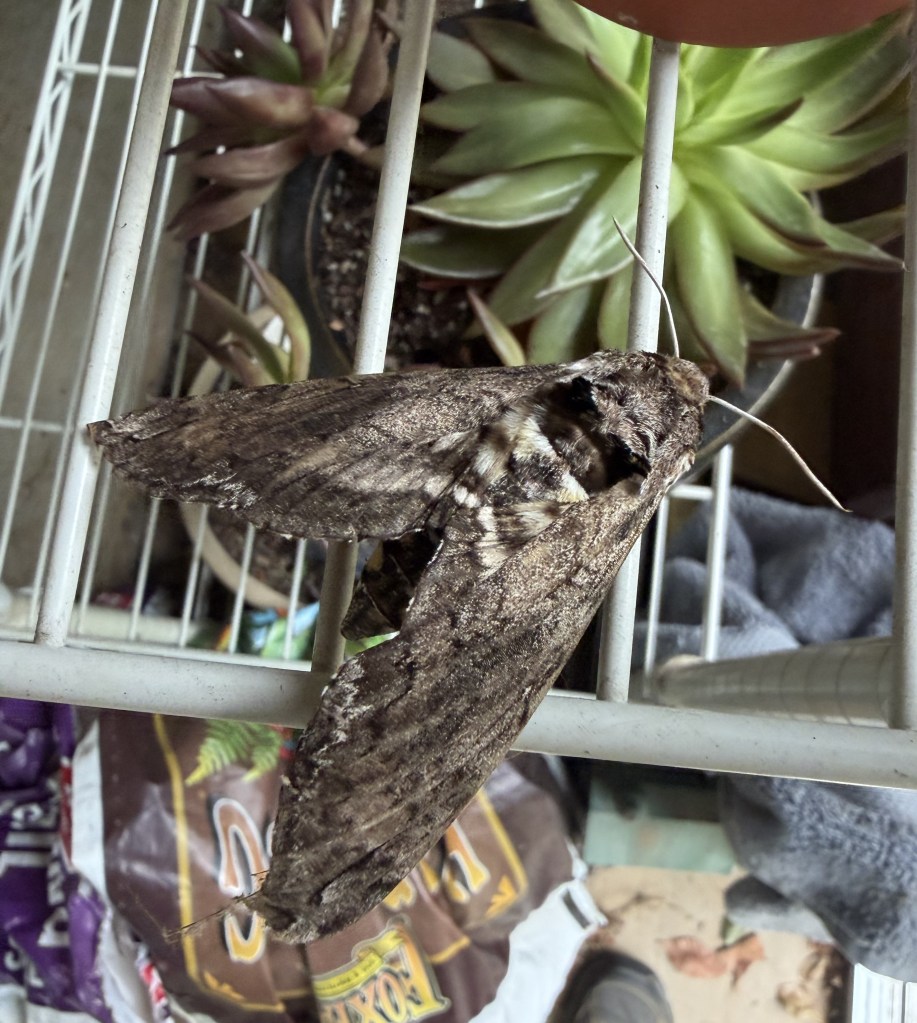
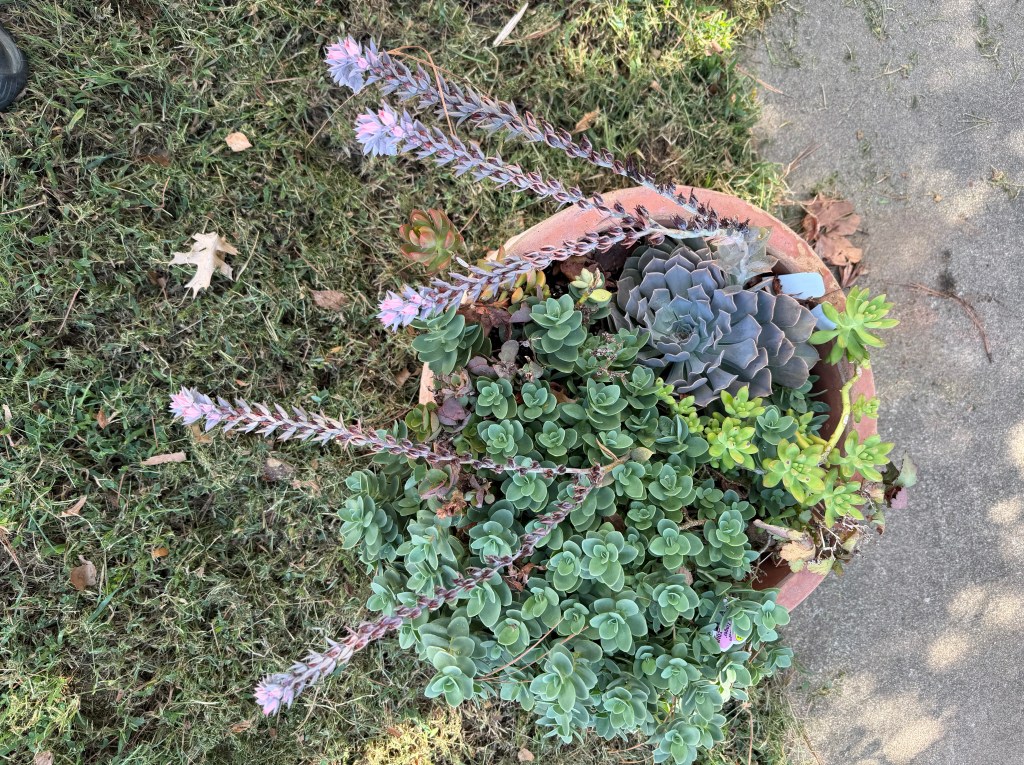
Before Melissa retired, our breakfast nook table was her computer workstation in one half and the other served as a dedicated workstation for her succulents.  The computer is now gone, and the succulents took over the whole.  The table sits in front of a large bay window that allows Melissa to watch the birds come to feeders placed just outside.  While we have always had numbers of house sparrows (Passer domesticus) these have recently been joined by a flock of young house finches (Haemorhous mexicanus). Over the last two weeks Melissa has noticed an increase in ruby-throated hummingbirds (Archilochus colubris) coming to the hanging basket of button sage (Lantana involucrate) that sits among the feeders.  I find this species interesting as the male is brown with a ruby throat and white belly, while the female is green with a white belly.  With the increase in birds, Melissa cleared a spot for me to sit and read the morning paper and do my crossword.  I have also noticed several bumble bees (genus Bombus) and large moths (order Lepidoptera) on the same flower.  While I failed to document these fast birds, I did find a waved sphinx inside our porch.

When I went online, I found the waved sphinx (Ceratomia undulosa) is a common large moth in the family Sphingidae.  The species was first described by Francis Walker in 1856 and can be recognized by its mottled gray-brown wings and distinct wavy lines, with a small centered white spot on each forewing.  The moth has a 3 to 4.25-inch (7.6 to 10.8 cm) wingspan.  Despite its large size, its camouflage allows them to rest safely against tree bark.  It is native in the US and southern Canada, east of the Rocky Mountains.  Adults are strictly nocturnal, hiding with the dawn.  The Sphingidae family of moths are informally known as hawk moths because of their fast, strong, and hovering flight style, which resembles how a hawk flies.  They have long, narrow wings and streamlined bodies built for rapid movement.  The most common predator is the Guiana Striped Scorpion (Centruroides guianensis) which feasts on the moth’s egg clusters.  As the two species seem to arrive at the same time, the scorpions show up as the moth lays eggs, there was a wrong conclusion the moths give birth to the scorpions (i.e., the name Scorpion Moth).  Many Sphingidae caterpillars are known as hornworms from a distinct, horn-like spine located on their last abdominal segment.

I was concerned when I learned the waved sphinx was a horn worm.  The five-spotted hawkmoth (Manduca quinquemaculata) caterpillar is a major pest often referred to as the tomato hornworm and uses tomatoes as the host plants.  The food of the waved sphinx larvae are trees, and include ash (Fraxinus), privet (Ligustrum), oak (Quercus), hawthorn (Crataegus) and fringe tree (Chionanthus virginicus).  The caterpillars (larvae) go through five distinct growth stages (instars) over 3 to 4 weeks, shedding their skin each time.  When ready, the larvae crawl from the plant and burrow a few inches/centimeters into the soil to pupate.  In colder regions, the pupae overwinter underground in this chrysalis stage until spring.  In warm months, this stage lasts 1 to 3 weeks.  The adult moths emerge from the soil in spring or summer and live for 1 to 3 weeks before they reproduce and start the cycle again.  Adults feed on flower nectar using a long mouth tube (proboscis). 

Thoughts: When I tried to get close for a photo of the waved sphinx moth, I realized it was dead.  Even if it had been alive, it posed no threat to my garden.  I remember seeing the large green tomato hornworms in our garden when I was a child.  While I did not understand them as a pest, I was awed by their size.  The same was true with the adult sphinx.  It is common for humans to fear large creatures before we determine whether they are a threat.  We can treat other humans the same way.  Act for all.  Change is coming and it starts with you.
Planting

August 10, 2026

I blogged several weeks ago about tearing the last of the plants out of my raised beds to prepare them for fall planting.  I purchased the seeds after cleaning the beds but was hesitant to plant them in the ground with the searing 100’s+F (37.8+C) heat.  Yesterday I decided to move ahead.  Like most things I do, the beginning of one project cannot happen until others get done.  The raised beds use the hügelkultur (logs and brush) and while I do not have any collapsed holes, the beds all sank since I refilled them in April.  That meant I needed to get a load of potting mix from the mulch yard.  By the time I got ready it was too hot to work on Saturday, and the yard is closed on Sunday.  The onion sets (Allium cepa) were starting to go bad, and I did not want to wait another week.  I calculated what it would cost for a half cubic yard (third cubic m) and found it would not be much more to purchase 40-pound (18 kg) bags of mix.  I knuckled down and bought 15 bags to refill the beds, and the six new potato grow bags.  I needed to know when I should be planting the various seeds.

When I went online, I found The Farmer’s Almanac provides a Fall planting calendar for my zone (7b).   The 9th and 10th were the most favorable days for planting beets (Beta vulgaris subsp. vulgaris), onions, turnips (Brassica rapa subsp. rapa), and other root crops so I was good there.  I am also planting radishes but with their short growing period (30 days) I decided to wait and try to harvest everything together.  The 18th and 19th were recommended for my peas (Pisum sativum), so I guess I jumped the gun on those.  The broccoli (Brassica oleracea var. italica) recommended I plant seed starters and replant them in 2 weeks.  I instead planted them directly in the ground now (we will see how that goes).  The 25th to 27th are barren days, and a good time for killing plant pests.  If the squash vine borer (Melittia cucurbitae) comes back, I will be ready.  The 28th and 29th are excellent for any vine crops like my squash.  Again, I already planted zucchini and straightneck squash (both Cucurbita pepo).  Hopefully, this will work intuitively rather than by the Almanac (it could happen).

When I was clearing my beds for planting, I mentioned I had five (really) small heads of cabbage (Brassica oleracea) that I cleaned and put in the vegetable bin.  All I needed was inspiration for what to do with them.  With my other crops in the ground, I decided to try another batch of sauerkraut.  I made one quart (0.9 l) a month ago and it is fermenting well on the pantry shelf.  I sliced the cabbage last night, then got distracted.  I had put salt on the sliced cabbage, and it sat on the cabinet all day yesterday.  I was too tired to deal with it last night, so I placed it in the refrigerator.  That proved to be a mistake.  When I took it out this morning the cut leaves needed to be kneaded for 5 or 6 minutes to break them down and bring the water out.  While I could have let it raise to room temperature, I had already procrastinated enough, and I moved ahead.  The cold nearly froze my fingers.

THOUGHTS: I seem to treat planting the same way I do cooking.  There are recipes out there, but what is the fun of that?  There are planting guides out there, but what could it hurt?  Both the recipes and planting guides follow proven methods.  While chefs often improvise for new tastes and cuisines, unless you are trying for a new cultivar, gardeners rarely do.  There is also wiggle room built into the planting suggestions.  If my unorthodox schedule works, there will be plenty of vegetables for the food bank.  If it does not, we already support them monetarily.  You always need a backup plan.  In graduate school I was frowned upon because I did not support a specific theory, instead preferring to be eclectic.  Eclectic is harder because you need to understand multiple theories and be willing to see what works in each situation.  While this may not be the safest approach, it can produce a better result.  Being open can also be valuable in life.  Act for all.  Change will come and it starts with you.

Electroculture

July 31, 2026

This week I tore out the last of the plants in my raised beds.  The first to go were the remaining onions (Allium cepa) I had left in the ground.  I found it was a mistake to leave the mature bulbs in the ground as the sun and high temperatures (95F+/35C+) burned the tops of the bulbs that stuck out of the soil (another learning experience).  It became clear the cabbages (Brassica oleracea) were done forming into heads and were just soaking up water.  I joked with Melissa that I had raised “tiny cabbages”, my cutesy name for brussels sprouts (also Brassica oleracea).  They came out, and the small heads are waiting in the vegetable bin for me to do something with.  The volunteer cantaloupe (Cucumis melo) only produced two viable fruits and there were no new flowers, so out it came.  The last to go were the two cucumber plants.  They had produced well, including 14 pints of canned dill pickles and numerous pounds to donation.  Now I need to prepare the beds and get ready for my fall planting.  Thinking about what goes where always puts me on alert, so my interest was perked when I came across a Facebook reel touting the virtues of Electroculture Gardening.  

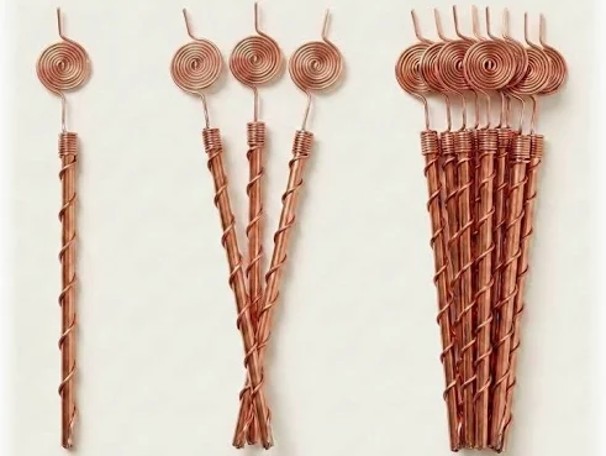
When I went online, I found electroculture gardening is an alternative practice involving placing copper wires, antennae, or magnetic coils into the soil to capture atmospheric and geomagnetic energy.  Proponents of the technique claim it accelerates growth, increases crop yields, and repels pests.  Mainstream science views these claims as lacking “robust” empirical proof.  The copper antennas are simple enough to make and are readily available for purchase.  They consist of copper wire wrapped tightly around an 11 inch (37.5cm) wooden or bamboo stake that is then pushed about 3 inches (7.5 cm) into the soil.  In the Northern Hemisphere you twist the wire in a clockwise spiral to supposedly match local magnetic forces.  You can also place open loops of copper wire (Lakhovsky-style coils) around the bases of individual plants.  This coil is a simple open-ended loop of wire with overlapping ends that do not touch, invented by Georges Lakhovsky, to act as a passive resonant circuit.  Controlled tests and academic agricultural reviews find no verified mechanisms or consistent data showing that passive copper wire acts as an effective power antenna or nutrient booster for soil, and suggest standard alternatives (organic compost, maintaining proper hydration, and rotating crops) work as well or better to improve harvest. 

I have tried several trendy methods to grow or increase the produce in my yard.  This includes raised beds using hügelkultur (built over logs), cloth grow bags, the three sisters (corn/ Zea mays, beans/ Phaseolus vulgaris, and squash/ genus Cucurbita) grown in mounds, 5-gallon (19 L) buckets, and containers.  I even have gone so far as to plant directly in the ground (ha ha).  All these methods have been successful at times, and at other times not.  I am constantly trying to increase yields to make our household more sustainable and less dependent on outside resources.  I have yet to be consistent.  

THOUGHTS: Electroculture gardening seems to be another attempt to improve crop yield.  Some have made a stark claim that the world only has a limited number of harvests left (100, 60, or even 30).  While the claims are overblown, soil erosion rates from across the world span five orders of magnitude.  Around 16% of the world’s soils are eroding quickly and have an estimated lifespan of less than 100 years.  Half of the soils are eroding slower with a lifespan greater than 1000 years while one-third have over 5000 years.  As with my garden, we need to protect our soils with agricultural practices like cover cropping, minimal to no tillage, and contour cultivation.  While it is feasible for me to test electroculture, extending the world’s soil will require a proven and cooperated effort across every country.  Act for all.  Change will come and it starts with you.

Triceratops Beetle

July 27, 2026

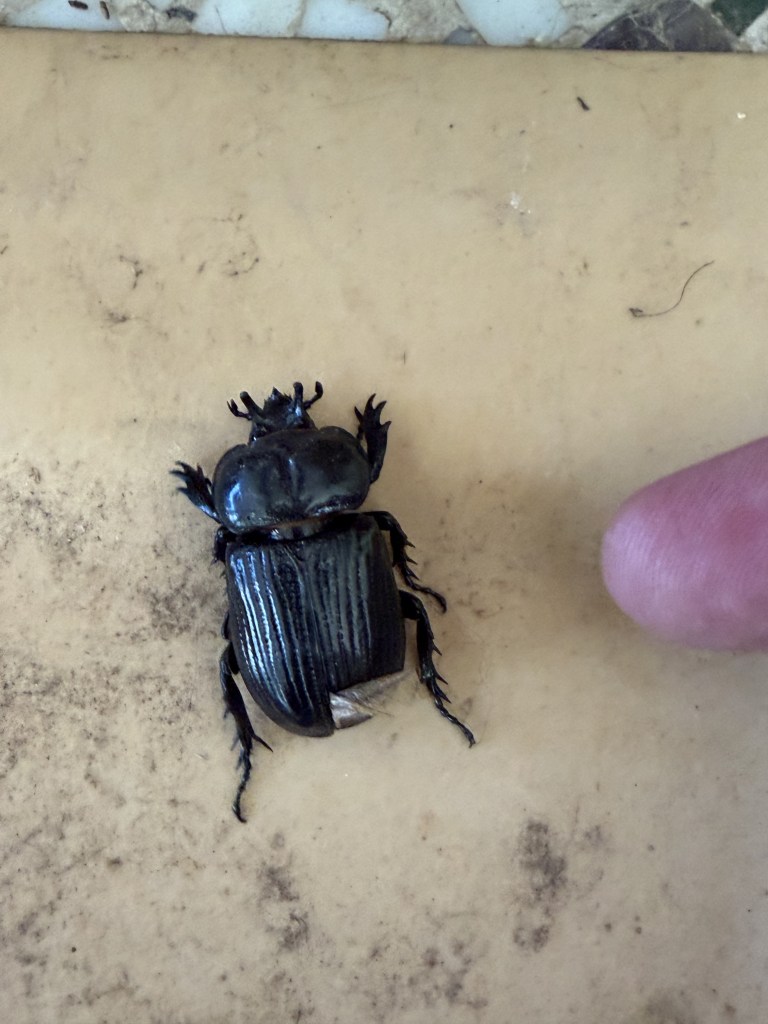
When I go out the back door it is always a mad scramble for the kids to race out into the yard.  Sometimes I will stop at the door and hold up my hand (command to sit).  Loki is usually reluctant but will slowly obey my command.  Zena often instead crouches down a bit and whines in protest but will then sit.  I did not require them to sit as I walked out to water the back garden today.  When I opened the door there was the immediate scramble as each tear through the door, through the sun porch, and out into the yard, hoping to catch a slow gray squirrel (Sciurus carolinensis) on the bird feeders.  As I walked out after them, I noticed they had both run over a large black bug lying on its back.  It appeared to be in distress as its legs were flailing in an apparent attempt to right itself.  As I was watching the bug the kids noticed me looking and came back to investigate.  First Zena and then Loki came in through the door, and I had to shoo them away.  I was reluctant to pick the bug up as I did not know what it was, so I swept it into a dustpan and turned it back onto its feet.  After turning the bug over I recognized it as a triceratops beetle.

When I went online, I found the triceratops beetle (Phileurus truncatus) is a species of beetle of the family Scarabaeidae (scarab beetles).  The beetle ranges across much of southern North America, up to the central south.  It is known for its three horns present on both sexes.  The name is a reference to the triceratops dinosaur (Ceratops horridus) that lived in the Late Cretaceous period (68 to 66 million years ago) on the island continent of Laramidia, now forming western North America.  Adult beetles range from 1.25 to 1.5 inches (32 to 38 mm).  Males have thicker, more blunt horns that curve more aggressively towards its body, while females have thinner, straighter, pointier horns.  The horns have a divot running down the center of their prothorax dividing both sides, with a very small bump just before the divot.  When they beetles are disturbed that produce sound (stridulations) by rapidly rubbing their hardened forewings against their abdomen.

The triceratops beetle is considered good for your yard and garden.  As grubs, these beetles live inside rotting tree trunks (oak preferred) and consume the wood.  After pupating into adults, they consume the grubs of other beetles.  Hopefully this one has been feasting on the squash bugs that invaded earlier.  I set the dustpan down and took a picture of the beetle.  I had planned to safely release the triceratops back into the garden (and out of my house), but when I turned back to look, it was nowhere to be found.  Our porch stores my bird and garden supplies, along with several hundred of Melissa’s succulents, and it apparently flew off and hid somewhere in the room.  We keep the outside door open most of the time for circulation and we do have the occasional house sparrow (Passer domesticus) or paper wasp (Polistes dominula) that attempt to make this area their home.  The triceratops might have done the same thing.   

THOUGHTS: Having a triceratops beetle on our sun porch is not a bad thing, but I hope she (smaller horns) finds her way back outside.  To my knowledge there are no beetle grubs living on the concrete floor.  The ancient Egyptians revered another scarab beetle (Scarabaeus sacer) as a powerful symbol of rebirth, the morning sun, and creation.  They connected the dung beetle’s habit of rolling a ball of dung across the sand to the sun moving across the sky.  When young beetles hatched from the buried dung, the Egyptians saw it as a sign of life coming from nothing.  When I visited the great pyramid at Giza there were several people selling terra cotta beetles with a bright blue glaze (faience).  One gave a free beetle to each of the three ladies I was traveling with.  After they walked off, he turned to me and said, “As you will.”  They were gone and “free” beetles cost me US$1 (EGP51.37 Pounds) each.  Another cultural lesson learned.  Act for all.  Change will come and it starts with you.

Flea Beetle

July 17, 2026

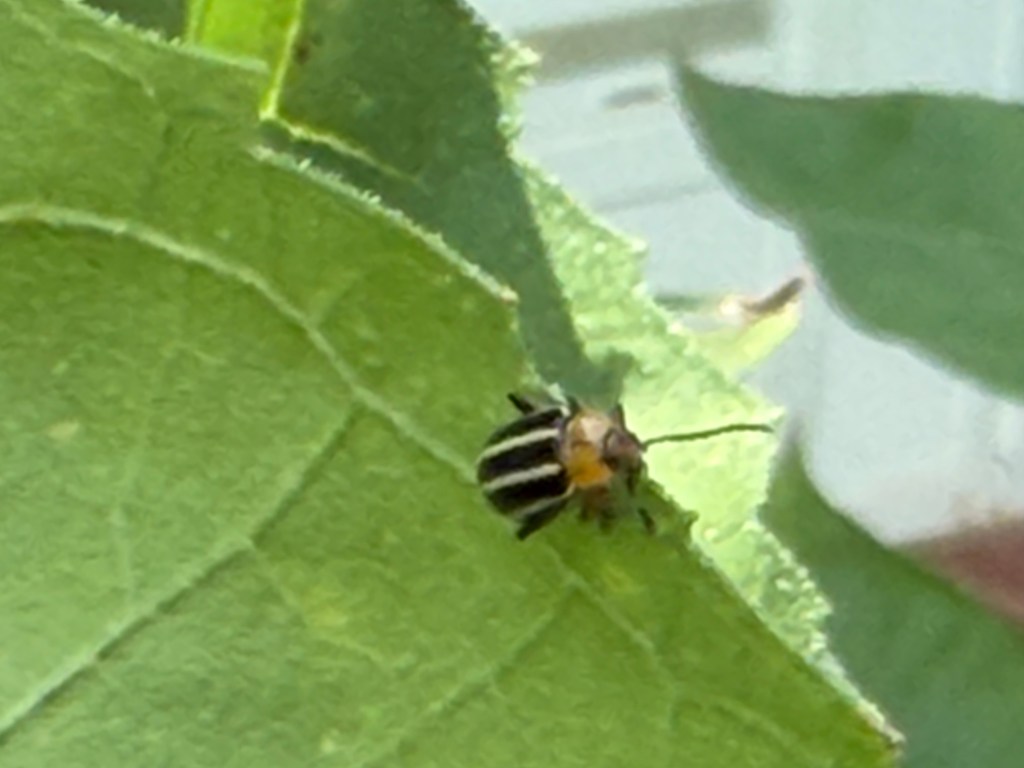
Several days ago, I mentioned my battle with insects in our garden and flower beds.  I have overcome the squash bugs (Anasa tristis) this year, but the vines rotted before I got much fruit.  I only found a few bugs on my squash, but I finally located squash vine borer moths (Melittia cucurbitae) on my sunflowers.  The vine borers lay their eggs on the underside of leaves and when the larva hatches, they bore into the vines and can cause them to rot.  That seems to be the clear case for my squash (genus, Cucurbita), but it did not account for the pitting I saw on the red amaranth (Amaranthus cruentus) leaves in the bed.  I have been checking the plants daily for any moths and the underside of the leaves for eggs, capturing the moths (if possible) and scrapping the eggs off the leaves.  If the leaves have already been discolored, I am cutting them from the plant.  My close early morning inspections proved fruitful today as I spied another beetle on one of my sunflower leaves.  When I checked it was identified as a pigweed flea beetle.

When I went online, I found the pigweed flea beetle (Disonycha glabrata) is a species of striped flea beetle in the family Chrysomelidae.  This small, striped leaf beetle is known for skeletonizing plants in the Amaranth family (like it did mine).   Plants in the amaranth family may be called pigweeds because they were/are used to feed pigs.  The flea beetle is active in gardens and fields during the summer, chewing tiny round holes and laying eggs on the leaves.  The larvae spend their first 13.5 days in the soil before crawling out as adults.  The Pigweed Flea Beetle has a red and black head.  The red, shield-like part on an insect’s body (pronotum) has a black dot in the center, or may have three black dots, depending on the individual.  The black wing coverings (elytra) have four yellow lines on them, with the two on the left connecting at the bottom as do the two on the right.  Antennae are black, and legs are red and black.  Other members of the same genus have a similar appearance, but the width, color, and number of the lines on the elytra differ between them.

The pigweed flea beetle is active from late spring through autumn and is not considered a significant pest in a backyard garden.  That is unless you are trying to grow red amaranths.  It is best to use a multi-step approach to control and manage infestation.  Start by placing fine Floating Row Covers over young plants immediately after planting to block access.  Once plants are established, spray them with organic Spinosad or Neem Oil.  These sprays must be applied in the early morning or evening and directly contact the beetles to be effective.  While Neem Oil is considered organic, spraying in the evening eliminates possible contact with the pollinators who would also be harmed by the oils.  Flea beetles are highly attracted to plants like radishes or hemp and planting these near your valuable crops creates sacrificial targets that can be easily treated or vacuumed.  Flea beetles locate food by smell and interplanting strongly scented herbs like mint (Family, Lamiaceae), basil (Ocimum basilicum), or catnip (Nepeta cataria) can confuse the pests.  This would also make our neighborhood cats happy.  Tilling the soil in the fall and removing garden debris helps destroy overwintering adults and larvae hidden in the topsoil.

THOUGHTS: Finding the pigweed flea beetle solved another riddle from my garden.  Last year it was the pock marked squash leaves (squash beetle), and this year it was the rotted vines (squash vine borer) and skeletonized amaranth (flea beetle).  I have found knowing the cause does not resolve the problem.  You also need to take appropriate (and specific) action.  This is where listening to science and experts can be invaluable.  Otherwise, you risk wasting time and money, and sometimes your integrity.  Act for all.  Change will come and it starts with you.

Squash Vine Borer

July 14, 2026

For the last three years I have waged a battle with squash bugs (Anasa tristis).  While I found a few individuals on my squash (genus, Cucurbita) this year, they have not been abundant and when I do see one I remove and dispatch it.  Even so, every one of my squash plants died early.  The cucumbers (Cucumis sativus) are thriving, but they were planted late and after the squash were gone.  Squash bugs feed by piercing the leaves and stems to suck out plant sap, causing foliage to develop speckled yellow spots before turning brown and dying.  I was still finding my leaves riddled with holes, but what led to the squash demise was the vine above the roots disintegrated.  This seemed a different culprit than what I faced in the past.  I attributed this to the cool and wet weather we had this spring leading to vine rot.  I have similar leaf problems in the sunflower bed to the north and every one of the red amaranths (Amaranthus cruentus) are riddled with bite holes.  While watering yesterday I noticed what looked like small beetles on the leaves of several of the sunflowers (Helianthus annuus).  When I tried to remove them, they “jumped” to the other side of the leaf.  Then one of them flew off.  I was looking at a squash vine borer infestation.

When I went online, I found squash bugs and squash vine borers (the “moth” pest) are two distinct cucurbit (cucumbers, squash, melons, and pumpkins) pests.  Squash bugs are “true bugs” (flat, dark gray/brown, resembling stink bugs) that suck plant sap while squash vine borers are daytime-flying moths whose caterpillars burrow into stems and kill vines from the inside.  The squash vine borer (Melittia cucurbitae) is a daytime (diurnal) species of clear wing (sesiid) moth often mistaken for a bee or wasp because of its movements and the bright orange hind leg scales.  Females typically lay their eggs at the base of leaf stalks, and the caterpillars develop and feed inside the stalk, eventually killing the leaf.  They soon migrate to the main stem, and with enough feeding damage to the stem, the entire plant may die.  The moth is considered a pest as it attacks cultivated varieties of genus Cucurbita (squash, zucchini, pumpkin, and acorn squash).  The squash vine borer is native to North America, with some reports as far south as Brazil and Argentina.  It lives in most temperate North American states, except the Pacific coast.  Southern states have two broods a year (lucky for us).

Pesticides are ineffective to control squash vine borers once the larva gets inside the plant, and since the north bed is meant for pollinators, cannot be used as they would kill what I am trying to feed.  I have been trying to catch and dispatch anything I see, but they are fast.  An organic control is to inject BT (Bacillus thuringiensis) bacteria into the base of the stem using a syringe to kill the larvae.  The injection should be done after the first flowers start to show and again after a few weeks.  This method is quite manual and is only useful to small-scale or home gardeners (and too much work for me).  You can wrap the lower stem with nylon stockings or aluminum foil to prevent egg laying, which generally occurs within a couple of inches from the point where the stem emerges from the soil.  Some gardeners place a yellow bowl filled with water and a drop of liquid dish soap to attract and drown the adult pest.  This method provides feedback on the level of infestation and along with daily checking the plants for eggs is popular with organic gardeners.  Now I need a yellow bowl.

THOUGHTS: I try and be conscientious about organic farming on my vegetables, but the squash vine borer is testing my limits.  Perhaps it is a good thing that most pesticides are ineffective on the insects.  I realize I am feeding some insects even as I try to eliminate others.  The same is true as I grow weeds (wildflowers) even as I pull others from my beds.  Humans tend to make similar decisions with the people they cooperate with.  Act for all.  Change will come and it starts with you.

Mason

June 21, 2026

I have mentioned our two flower beds dedicated to wildflowers.  The one on the north side of the house has sunflowers (Helianthus annuus) and cone flowers (Family, Asteraceae), while the east bed has a self-propagating mix of wildflowers (the package literally said, “wildflower mix”).  These beds attract a variety of bees (Clade, Anthophila) and butterflies (Family, lepidopteran).  Attached to one of my browsers was an ad asking for my support for local pollinators.  The ad described how honeybees do little of the pollination for gardens and orchards.  Honeybees (genus, Apis) produce honey, which along with their brightly colored yellow and black bodies make them attractive.  They also form colonies (hives) that are often located around orchards or even transported as rentals for pollination.  What I did not know until I opened this ad was that 90% of pollination is performed by a solitary bee known collectively as mason bees.

When I went online, I found a mason bee refers to bees in the genus Osmia (Family, Megachilidae) who derive their name from the habit of using mud or other “masonry” products in constructing their nests.  These nests are made in naturally occurring gaps such as cracks in stones or other small dark cavities.  Some species preferentially use hollow stems or holes in wood made by wood-boring insects.  Over 300 species are found across the Northern Hemisphere, but most occur in temperate habitats of Europe and Asia (Palearctic) and North America (Nearctic) and are active from spring through late summer.  Osmia species are frequently metallic green or blue, although many are blackish and at least one is rust-red.  Most have black ventral masses of black hairs on their hind legs (scopae) which are difficult to notice unless laden with pollen.  Two species of the genus, the orchard mason bee (Osmia lignaria) and the blueberry bee (Osmia ribifloris), are native to the Americas, although the orchard mason have been moved from their native ranges for commercial purposes.

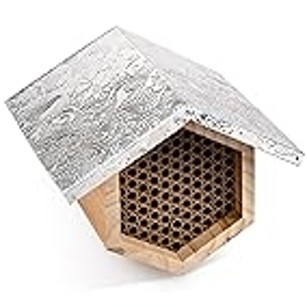
If you want to make your garden an inviting and safe space for the mason and other solitary bees, avoid cute, shallow decorative models.  Instead look for removable paper or cardboard tubes or wood laminate trays.  If bees nest in drilled in solid blocks, the house becomes a trap for diseases and mites after a single season.  The holes should be exactly 5/16-inch (8 mm) in diameter and at least 6 inches (15 cm) deep.  If the holes are too wide, bees cannot build secure mud partitions.  If the hole is too shallow, the female bees may only produce male eggs.  Solitary bees are sensitive to chemicals, so choose natural, untreated, or wood like cedar or pine.  Choose a sloped or overhanging roof (metal) to prevent rain from rotting the tubes, and a wire mesh on the front to deter woodpeckers.  The house should face southeast or east to receive early morning sun to warm the bees, encouraging them to start pollinating.  The house should be attached to a solid surface about 5 feet (1.5 m) above the ground.  I ordered one and got another for my grandchildren to enjoy, as well as the bees.

THOUGHTS: The mason bee house in the ad told of a 70-year-old man retiring after 50 years and this would be his last bee houses.  The ad pointed out the advantages of purchasing this house and its superiority over the commercial houses online or in stores.  It also said there were only 200 houses left.  I generally look elsewhere online to see if the “steals” offered by such sites are real and how they compare with other prices.  I had a red flag at “200 remaining” at a cost of “only US$69”.  My search pulled up a reference to possible scams.  When I looked, my ad fit the criteria.  The price was twice as much as other houses and did not meet the criteria listed among the “10 best”.  There are times we see a great idea that fits a criterion and we buy impulsively.  Even if this is the best deal, it should be checked.  Otherwise, we set ourselves up to be scammed.  That is true regardless of age.  Act for all.  Change will come and it starts with you.

Nativars

June 09, 2026

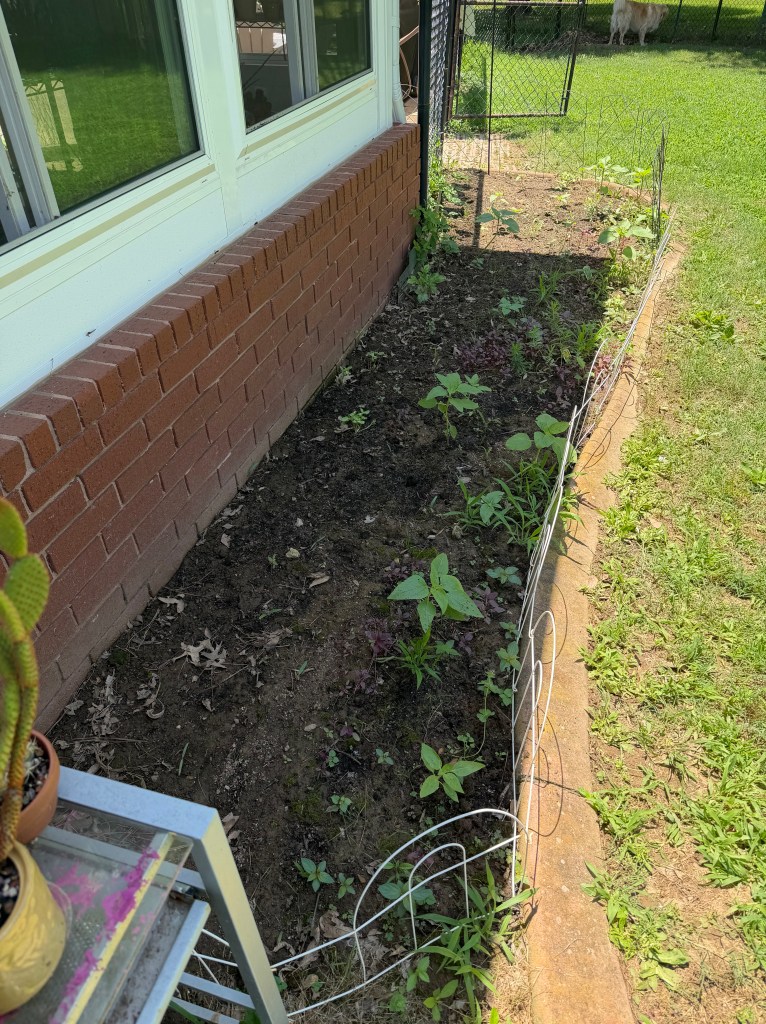
Toward the back of my local Sunday newspaper was a USA Today article on the need to plant native plants to help pollinator insects.  This caught my eye as I have dedicated two of our flower beds        to growing native wildflower mixes and Melissa has increased the number of potted plants around both the front and back of our house.  The bed in front was planted last year with perennials, and it reproduced this year.  The bed to the north (not full sun) contains two small tables with succulents but I added sunflowers (Helianthus annuus), crimson clover (Trifolium incarnatum), and red amaranth (Amaranthus cruentus) to the rest of the bed.  All the seeds in the north bed were past their expiration, but I prepared the ground and sowed the seed on the off chance they would grow.  While not all the seeds sprouted, I was pleasantly surprised by the number and variety of plants that are now growing.  While the newspaper article stressed how native pollinators prefer native plants, it also mentioned how recent plant breeding has created hybrid plants known as nativars.

When I went online, I found nativar is a blend (portmanteau) of the words ‘native’ and ‘cultivar’.  A nativar is a horticulturally bred strain of a plant species which distinguishes them from their native counterparts.  These plants may have different genetic traits from those formerly prevalent in the wild.  The difference between a ‘nativar’ and a ‘cultivar’ is if the species is grown within its native historic range.  The goal of using nativars within their historic species range is to reintroduce their ecological benefit into the local ecology.  The ecological consequences and benefits of nativars are a widely discussed concept within gardening and horticultural communities, as the capacity of nativar plants to fit the ecological niche of their native counterpart may be manipulated during the breeding process.  Nativars are developed for a variety of reasons, including disease resistance, pest resistance, and drought tolerance.  Within the horticulture industry, nativars are often developed for aesthetic reasons, such as improving bloom and foliage size, shape, form or scent, along with improved growth habits for a garden setting.  Nativars are developed within the agriculture and forestry industries for improved yield, flavor and quality.  Finally, nativars have been developed for restoration purposes in hopes of re-establishing native populations.

One of the ways nativars can be manipulated during the breeding and cultivation process is the capacity for a plant species to fit the needs of pollinator species that coevolved to rely on them.  Pollinator visitation rates of nativar plants may be increased, decreased, or unchanged relative to their wild native counterparts depending on altered factors such as bloom time, color, and shape. Nativars that dramatically change the bloom color of the species compared to wild populations can disrupt the ability of native pollinators to recognize the flowers as a food source.  The ecological benefit of nativars for pollinators can also be reduced by diminished nectar, pollen production, and flower form.  Not all cultivars that alter the bloom color from the most abundant naturally occurring flowers result in decreased ecological relationships.  It depends on the resulting hybrid and the selectivity of the pollinator.

THOUGHTS: Nativars are hybrids created for humans and not native pollinators.  They increase the bloom size or even result in double blooms, but they can also cause the plant to be sterile or reduce the amount of pollen or nectar produced.  Since our purpose for planting wildflowers is to attract (and feed) native bees (genus, Apis) and butterflies (order, Lepidoptera) I do not plan on sowing nativars.  Why and how humans act depends on the desired outcome.  If we are not purposeful, we cannot complain about an undesirable outcome.  Act for all.  Change will come and it starts with you.

Volunteer

June 03, 2026

I went to the eye doctor for my annual checkup today and when I returned Melissa wanted to show me something that had sprouted in the mailbox planter.  Melissa has tried to grow several different flowers in this brick planter.  The grape hyacinth (Muscari armeniacum) has done well and explode in early spring, but they dwindle and die leaving the box empty during the summer and fall.  We have tried a variety of different perennials, but none have lasted through the season, yet alone come back the following year.  This year Melissa tried something different by planting a central coneflower (Echinacea) hybrid (sombrero lemon yellow) surrounded by rose moss (Portulaca grandiflora) starts to act as an annual bedding and keep down the weeds.  While the rose moss plants are doing well, the coneflower is again struggling.  What Melissa wanted to show me, however, was an intrusive weed that was beginning to take over the lower left side of the planter.  It was obvious this volunteer was a tomato (Solanum lycopersicum) plant.

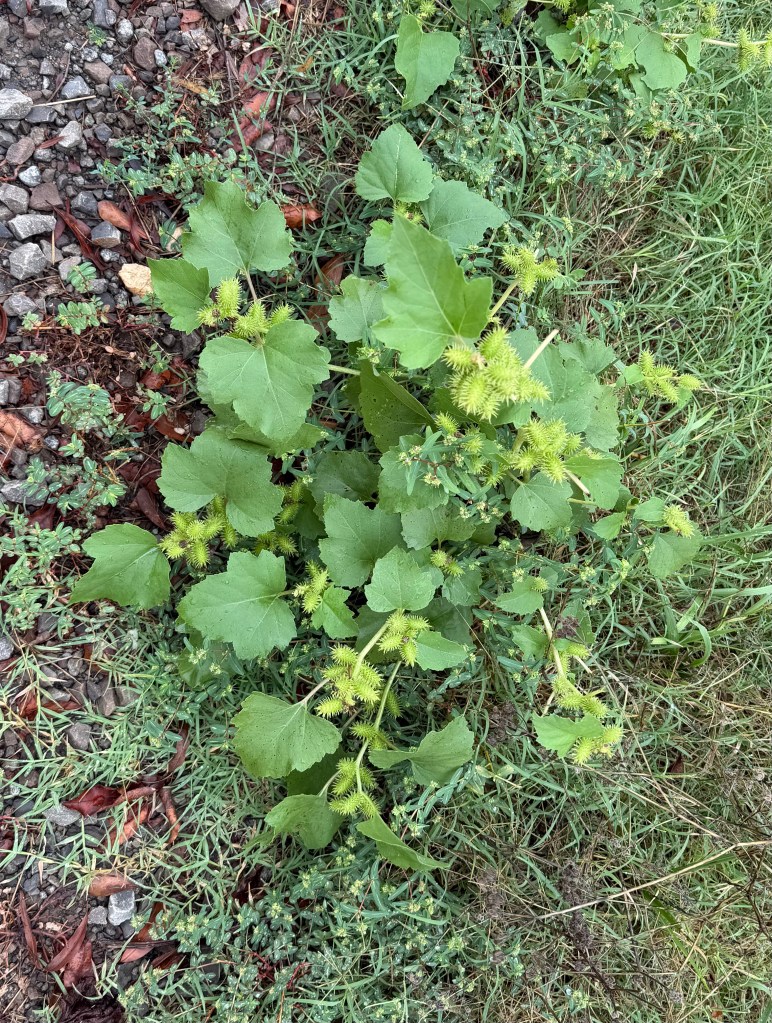
When I went online, I found “volunteer” plants in gardening are those that sprout and grow on their own without being intentionally planted.  They emerge from seeds dropped in the previous season, spread by wildlife, or distributed through homemade compost.  While some volunteers are thought of as nuisances, they can be surprisingly vigorous, cost-free additions to your garden.  On the plus side, a volunteer is free and takes no effort from you.  They can be exciting to find and can add fun and unpredictability to a well-planned garden.  On the minus side, the volunteer can grow in unwanted places, and you can never be sure what you are getting.  Seeds from open pollinated plants always produce a vegetable identical to its parent.  Seeds from hybrid plants are not true to form and it is more likely the volunteer will resemble one of the plants that produced the hybrid seed, and some hybrid plants will not produce any fruit.  The intruder can mess with the crop rotation you planned for your garden and can also carry soil borne disease.

When I saw the volunteer plant I wanted to dig it up and transplant it in the container where some animal had sat on one of my Roma tomatoes.  Melissa wanted to let it grow in place and see what it will produce.  All the seeds grown in my garden are from older cultivars (heirlooms) but most of the tomatoes are nursery purchases (heirloom and/or hybrid).  Since we have never planted tomatoes in the mailbox bed it must have gotten there from an animal or in the compost I used to enhance the soil.  This year I also noticed several volunteer plants in my raised beds.  These are some sort of unknown squash (genus, Cucurbita) that have sprouted in the rows of beets (Beta vulgaris) and a leafy lettuce (Lactuca sativa) that sprouted after I replanted the spinach with a cucumber (Cucumis sativus).  Here again, we must wait and see what is produced.   

THOUGHTS: While this is the first time to have a volunteer tomato in the flower bed, I have had a volunteer in my raised beds both years.  Last year my sown seed in one of the beds was overcome by large ground cherry (Physalis angulata) plants.  These grow wild in Arkansas and some harvest them from the open woods where they thrive.  I let them grow after finding out what they were and even tried harvesting them.  I did not like the taste and since they were blocking light to what I had planted I tore them out (again, one person’s weed is another’s harvest).  When you get a volunteer, you can leave them, relocate them, or remove them.  Humans seem to take a similar approach when other people move into their neighborhood.  Some are welcomed, some are asked to move to another area, and some are physically removed.  Currently in the US, the difference seems linked with ethnicity and culture.  Act for all.  Change will come and it starts with you.

Distribute

May 16, 2026

After filling my bird feeders, I was sitting on the patio waiting to see what species would arrive.  What I noticed instead was how my tomato (Solanum lycopersicum) plants had begun to grow this last week.  I mentioned I planted fourteen tomato plants this year, using four different types of containers.  My two sweet 100s (cherry) are in 5-gallon (19-l) buckets.  Three of the Arkansas Travelers (slicing) are in 5-gallon grow bags and the other three are in 10-gallon (38-l) terra cotta pots.  The six Romas (sauce) are in the plastic self-watering containers I purchased last year.  All 14 plants were over 2-1/2 feet (0.76m) and are starting to produce (green) fruit.  While I have known since our family garden as a child that tomatoes need trellises or cages for support, it was not until three years ago that I learned you should also prune your plants.  The small, secondary shoots that grow in the “V” joint where a leaf branch meets the main stem (suckers) should be removed as these produce less desirable fruit.  The bottom branches should also be removed to guard against pests and disease.  Pruning encourages the plant to focus on growing fruit rather than tall, bushy vines.  With the number of plants in the ground, it got me thinking of how to distribute the expected tomatoes.

When I went online, I found one way to distribute excess produce was called Fresh Food Connect.  This group was formed in 2016 with the goal of connecting local gardeners with the hunger relief efforts in their community to grow a more local and resilient food system.  Fresh Food Connect has a free mobile app that connects gardeners with their communities.  By 2024, Fresh Food Connect had grown to over 4,300 gardeners with over 65 hunger relief nonprofits in 28 states and has shared over 300,000 pounds (136077.7 kg) of homegrown produce with 166,000 community people experiencing food insecurity.  During 2025, 5,210 registered gardeners in 18 states connected with 54 local community partners to provide over 91,490 pounds (41,499 kg) of homegrown produce to over 51,870 individuals facing food insecurity.  This distribution amounted to grocery savings of US$457,460, or over 76,240 meals and over 91 tons (82.5 mt) of CO2EQ saved.   

I got excited when I learned of this effort to efficiently distribute home grown food to those with food insecurity.  I immediately downloaded the app and typed in my zip code to find a distribution center near me.  While there was (currently) no distribution near me, the Ozark Church Food Pantry was listed as only 52 miles (83.5 km) away.  I used the app to suggest they partner with the Crawford Sebastian Community Development Council in Fort Smith (15 miles/24 km away).  The app does allow me to register my donations outside of their network so I will probably continue to give locally and register my donation with Fresh Food.  Last year I also shared with my neighbors and several friends, and I will probably do that again this year.  Today I used my last jar of dill pickles making pickle de Gallo, so I am also looking forward to restocking my garden favorites.

THOUGHTS: Cassey Anderson, Colorado State University Horticulture Agent, provided the three Golden Rules when planning to distribute your harvest to a local food bank.   These are: Keep it cool, Keep it wet (when appropriate), Handle with care.  Harvesting is best done in the cooler parts of the day (morning/evening) and many crops can be harvested and placed directly into a container of cool water.  If you continue to harvest, make sure they are placed out of the sun.  Using a sharp knife or scissors is a better choice for harvesting rather than tearing the crop off the main plant.  This reduces stress on the plant, reduces chances of damage, and makes for a cleaner product.  Food insecurity is limited or uncertain access to adequate, nutritious food due to limited funds or resources.  Arkansas has the highest rate of food insecurity in the nation, with 19.4% of households struggling to access consistent, nutritious meals.  Act for all.  Change is coming and it starts with you.